Promotional E-mails to Send to One or More E-mail List(s)
|
|
Without a doubt Promotional e-mails are the most useful feature built into Community Builder! E-mails are still the most effective and efficient way to convey information
about your products and services to your clients and new prospects. Having a feature like Promotional E-mails that lets you easily craft beautifully formatted HTML e-mails
without having to write a single line of HTML code is indispensable.
|
For all of these tasks you will first need to:
-
Login to your Community Builder admin account.
-
Click the (Promotions) button.
|
Build a new promotional e-mail using a built-in system template:
-
Click the (Setup a Promotion With a System Template) button.
-
Enter a name into the [System Promotion Name] field.
-
Enter an e-mail subject into the [E-mail Subject:] field
-
Click the (Create New System Promotion) button.
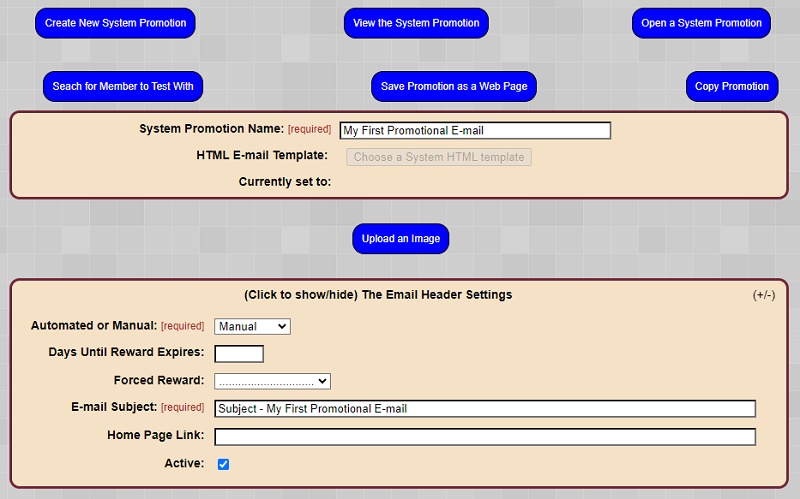
-
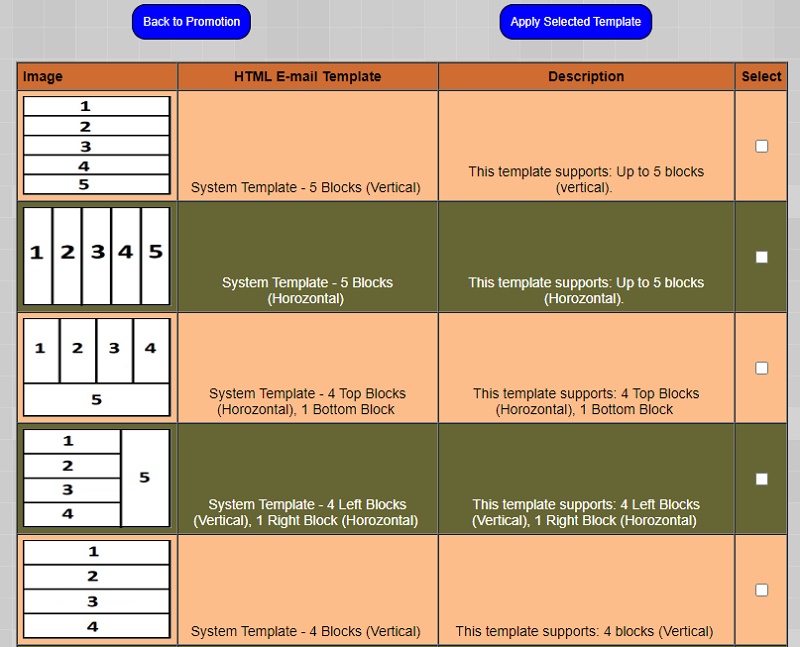
Click the (Choose a System HTML Template) button. The template you choose will determine the basic layout of your promotional e-mail and the number of "blocks" you will have to work with.
There are many more templates to choose from that displayed below. Basically, there is every combination of 5 blocks as rows and columns. Keep it simple at first until you gain some experience with this module!
Place a check mark next to the template you wish to use for your promotional e-mail and click the (Apply Selected Template) button. This will apply the template and take you back to the page where you can begin
building your promotional e-mail.
-
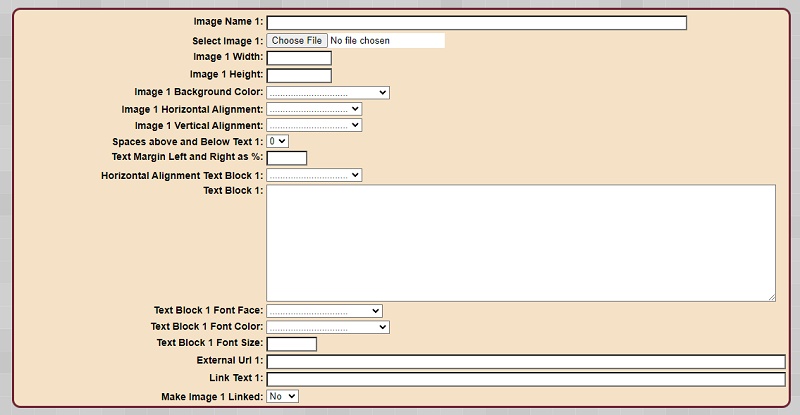
Notice there are five tabs. Each tab corresponds to one of the blocks in the template you chose. If your template only has two blocks for example then only Block 1 and block 2 tabs will be used in building your promotional e-mail.

-
These are the fields you have to work with on each block. Basically you can have an image, text and links in each block. The rest of the fields are for styling the block.
-
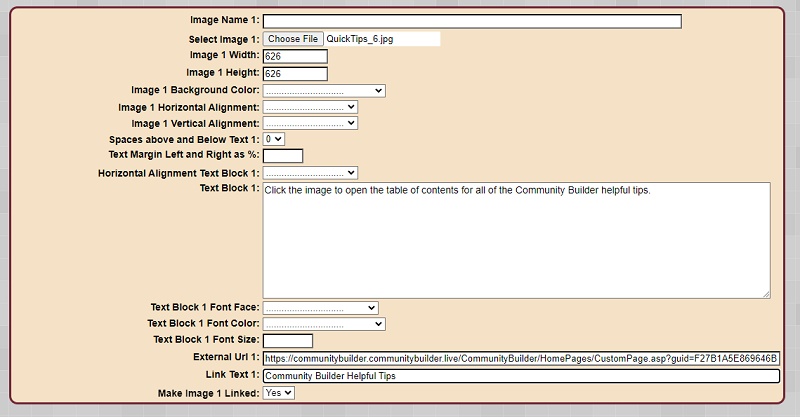
Let's add an image, some text and a link to block one. After that you can repeat the same process with the other blocks in your template.
-
Use the (Choose File) button to choose your image.
Enter the image height and width in pixels.
Enter your text in the [Text Block 1] text area field.
Enter the URL in the [External URL 1] field.
Enter the clickable text for the uRL in the [Link Text 1] field.
Select Yes from the [Make Image 1 Linked:] drop down list.
Click the (Save System Promotion button).
-
Click the (Upload Image) button and upload the image you have chosen.
-
Click the (View the System Promotion) button. It should show the image and the text you entered. While this is a good start let's go back and stylethe block.
Click the (Back to Promotion) button.
-
Select a background color for your image from the [Image 1 Background Color] drop down list.
Select the horozontal alignment of your image from the [Image 1 Horizontal Alignment:] drop down list.
Select the Vertical alignment of your image from the [Image 1 Vertical Alignment:] drop down list.
Select the number of spaces above and below the text from the [Spaces above and Below Text 1:] drop down list.
Enter a left and right margin % value in the [Text Margin Left and Right as %] field. Typical values may be 1-10%.
Select the Horizontal Alignment of the Text in text Block 1: from the [Horizontal Alignment Text Block 1:] drop down list.
Select the font family from the [Text Block 1 Font Face:] drop down list.
Select the font color from the [Text Block 1 Font Color:] drop down list.
Select the font size from the [Text Block 1 Font Size:] drop down list.
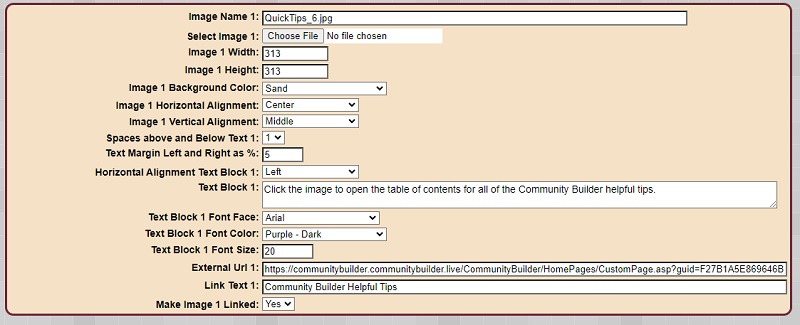
Click the (Save System Promotion button).
Click the (View the System Promotion) button.
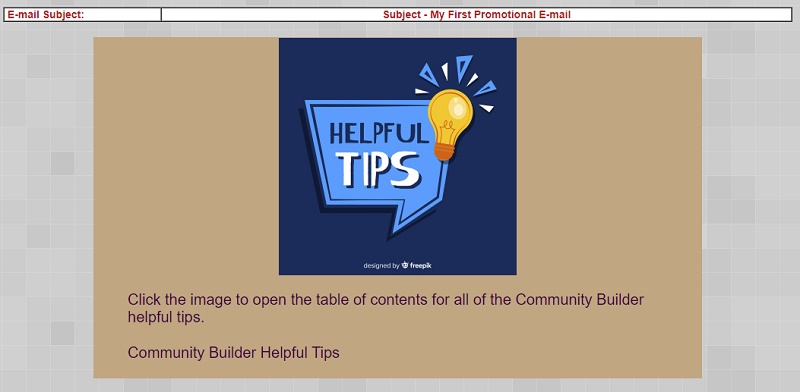
-
To complete your promotional e-mail perform the same steps for each block in the template you chose.
-
Click on the (+/-) of the [The E-mail Header Settings] section to add styling to the e-mail as a whole.
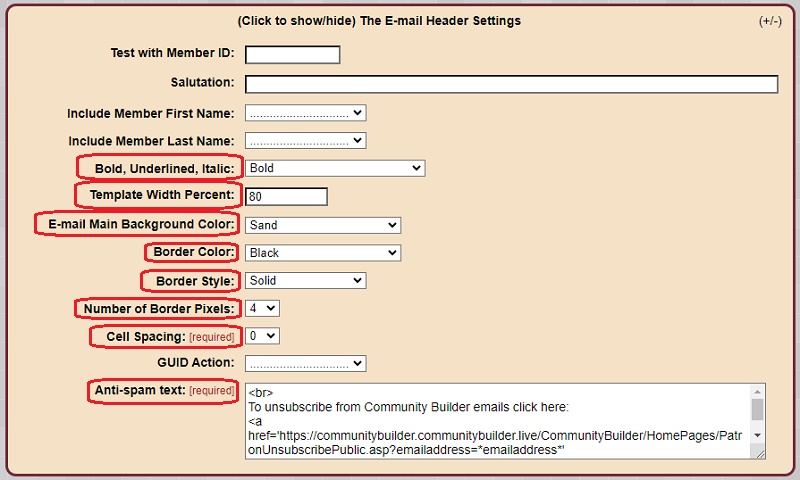
Select the font style from the [Bold, Underlined, Italic:] drop down list.
Set the overall width percentage of the e-mail by entering the percentage in the [Template Width Percent:] field.
Select the background color of the e-mail by selecting a color from the [E-mail Main Background Color:] drop down list.
Select color of the border from the [Border Color:] drop down list.
Select the border style from the [Border Style:] drop down list.
Set the border width by selecting the number of pixels from the [Number of Border Pixels:] drop down list.
Set the cell spacing from the [Cell Spacing:] drop down list.
Enter the anti-spam text to allow the recipients to opt out of future e-mails.

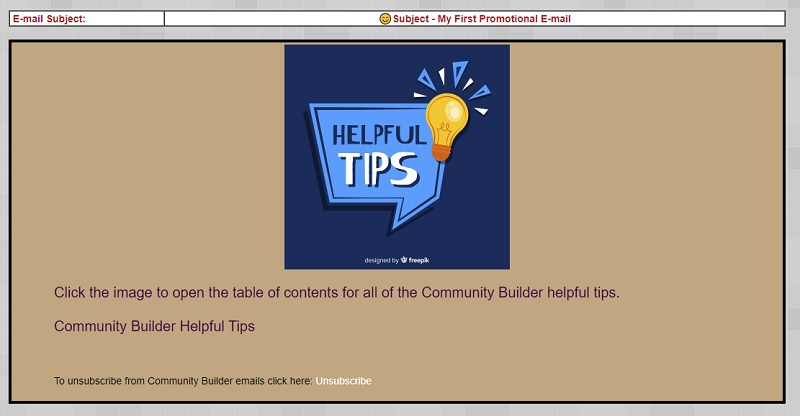
Click the (Save the System Promotion) button.
-
Click the (View the System Promotion) button.
|
Save time on your next promotional e-mail:
-
Designing and refining a promotional e-mail can take a significant amount of time! However, once you have perfected an e-mail you can easily re-use many parts of it
in the next promotional e-mail by simply copying it and then making changes to an already completed e-mail.
-
Click the (Copy Promotion) button.
-
Enter the name of the new promtional e-mail and click the (Copy Promotion) button.
-
From the main admin promotional e-mail panel click the (Lookup a Promo Built W / a System Template) button. The new copy of the promotional e-mail will be listed in the table.
Click on the copy of the promotional e-mail to open it and make changes for the new promotional e-mail.
|
Save the promotional e-mail as a web page:
-
Since the promotional e-mail is an HTML e-mail it can be saved as a web page.
-
Click the (Save Promotion as a web page) button.
-
Click the (Create Promotion e-mail as a web page) button.
-
To view the promotional e-mail as a web page copy and paste the generated URL into a browser. You must include the GUID query string! Now the
web page can be added as a link from anywhere in your community or any other websites you may be using.
|
Test your promotional e-mail before sending it out:
-
It is ALWAYS a good idea to test your promotional e-mails before sending it out to many recipients!
-
From the main admin promotional e-mail panel click the (Test Promotions) button.
-
Enter the e-mail address you wish to receive the promotional e-mail at.
-
Place a check mark next to the promotional e-mail you want to test.
-
Click the (Send Promotioal E-mail) button.
-
When you receive the e-mail in your inbox read through your e-mail carefully looking for spelling and grammar errors.
Also be sure to test all links you have included in your promotional e-mail. Make sure the e-mail subject is correct
for the e-mail being send especially if this is a copy of a previous promotional e-mail.
|
Sending out your promotional e-mail:
-
Once you have tested your promotional e-mail and are happy with the way it looks and reads it's time to send it out to your clients or prospects.
-
From the main admin promotional e-mail panel click the (Send Promotions) button.
-
Click the (Send to an E-mail List) button.
-
Promotional e-mails are queued up in a batch process and sent out twice a day. Enter an e-mail address into the [E-mail address to notify when complete:] field.
This is an e-mail address where you will receive notification that your promotional e-mail was sent when the batch process runs.
-
Choose the e-mail list you want the promotional e-mail to be sent to.
-
Select the e-mail server that will be used to send out the promotional e-mails from the [Promotion E-mail Server:] drop down list.
-
Enter your e-mail server proxy password.
-
Place a check mark next to the promotional e-mail to be sent.
-
Click the (Send E-mail Promotion) button.
-
NOTE: At this point the promotional e-mail has been added to the queue to be sent out during the next batch run.
However, if you decide not to send out the promotion for whatever reason you can remove it from the queue.
-
From the main admin promotional e-mail panel click the (List of Promotions Waiting to be Sent) button.
-
Place a check mark next to the promotional e-mail you wish to remove from the send queue and click the (Delete From the To-Be Sent Queue) button.
|